DEPENDING ON YOUR training approach, you might think about your body as being broken into two separate sections when you plan out your workouts.
There is the lower body, which encompasses the big leg muscles and depends on movements like squats, deadlifts, and lunges to train. For some guys, leg day is a dark, difficult affair. They’d much rather be doing an upper body workout, performing movements that train the chest, back, arms, and abs that result in much more noticeable muscle pumps and immediate gratification when they look in the mirror. Upper body exercises are some of the most popular moves in the gym, for good reason.
There are two dimensions to upper body training. The first dimension is probably the side of the coin most guys default to thinking about first: The way a well-developed upper body can look. There’s nothing the communicates being “in shape” more than a strong set of arms, a barrel chest, and rippling abs. No guy will say no to a nice V-taper torso, and many work hard to achieve that standard.
The second dimension is the one you should really be more focused on: the high level of functionality you’ll have by training your upper body smartly, with a balanced approach that emphasizes diversity of movement rather than just those that will make your t-shirt sleeves stretch. This approach will also be better for injury prevention, promoting good posture, and being efficient in everyday movements.
The right exercises can send you along your way to reaping the benefits of both of the above attributes. This list will help you cut through the clutter of trendy, cutting-edge movements and lean out the list out to a top 10 of must-dos for upper body development.
The Top 10 Upper Body Exercises
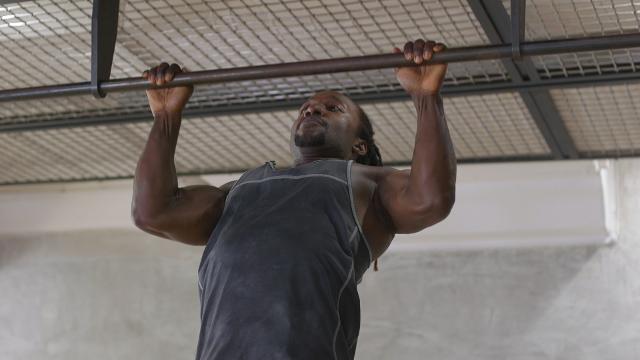
Pullup
Why: The barbell bench press may get a lot of love from the bros, but the true testimony to upper body strength is the ability to crack out great quality pull ups or chins. Not only are they a no-cheating movement, but they develop one of the healthiest regions of the body to work – the middle and upper back. For a great V-shape and developed upper arms, this is the gold standard and it shouldn’t leave your program.
How to Do It:
- Hang from a bar with an overhand grip that’s a bit wider than shoulder width (if you’re doing chinups, use an underhand grip that’s just inside shoulder width).
- Without using momentum or swinging, pull your shoulders down so your chest raises first, then focus on bending the elbows and pulling the body upward until the face clears the bar.
- Squeeze the shoulder blades together as you pull to ensure the lats are working hardest.
- Lower slowly and repeat.
Sets and Reps: Pullup skill can often depend on the size of the individual, so focus on making a baseline goal of being able to perform 3 sets of 8 reps. If you’re a heavier lifter (meaning, you weigh more), this may take some work. If you’re able to do this already without a problem, then knock out some weighted pulls using a weight belt and a light external load. Remember to focus on form first.
Military Press
Why: The standing barbell press is a premier strength builder and shoulder and trap developer. The exercise requires plenty of force production from the pressing muscles (deltoids, triceps, traps) but also requires an equal amount of stabilization from muscles like the abdominals, low back, and glutes. The best part: This movement allows for free mobility at the shoulder blade, to promote much better joint health than movements that require the scapulae to be pinned down and motionless.
How to Do It:
- Set a barbell at shoulder height in a squat rack and place the hands on it just outside shoulder width.
- Step out with the bar resting at collarbone level, and make sure the elbows are positioned directly below the bar—not behind it or in front of it. Stand tall, squeeze the glutes, and tuck the chin.
- Press the weight upward in a straight line (aim for your nose—you won’t hit it) as you exhale.
- Once the bar clears your face, push the head and chest “through the window” you’ve just created with your arms. The biceps should be next to the ears at the top of the lift as you lock the rep out.
- Lower the bar slowly to the start position, pause, and repeat. As you do all this, avoid excessively leaning back; remain rigid and tall.
Sets and Reps: For strength gains (which is what this movement is most suitable for), keep reps on the lower end. Start with 4 to 5 sets of 3 to 6 reps, using weight that’s challenging but allows good form.
Farmer’s Carry
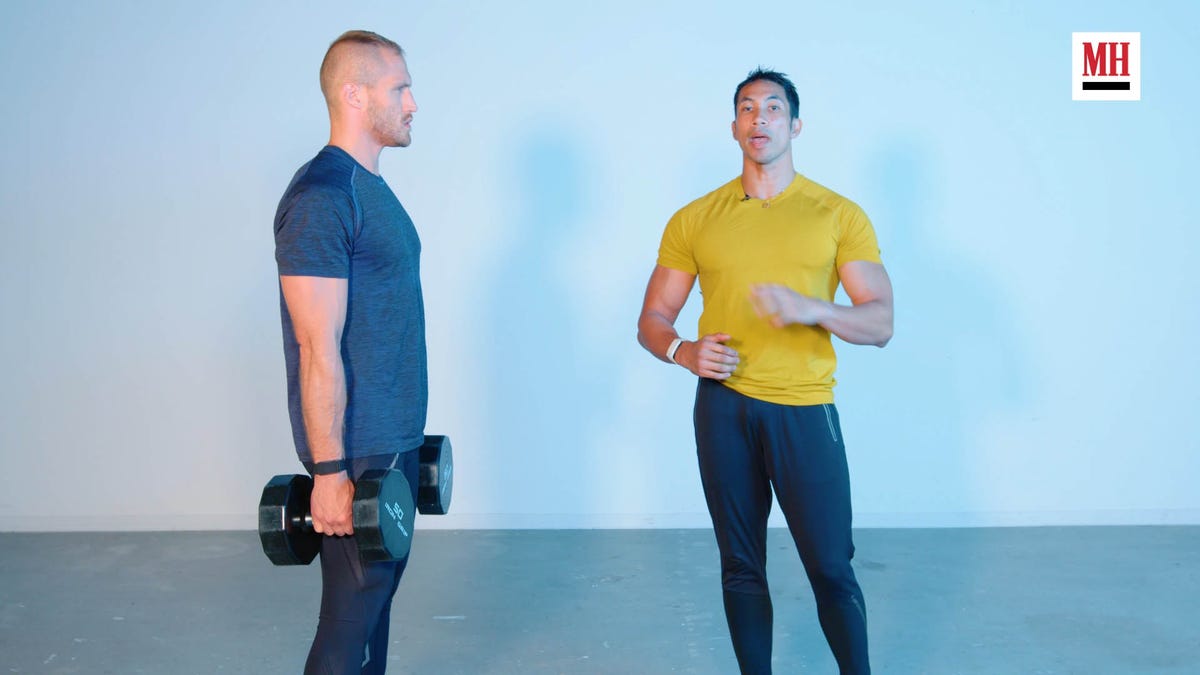
Why: This may seem counterintuitive, but loaded carries are more than just a conditioning tool and metabolic finisher for the end of your workout. They’re also a great way to add size to your upper body, particularly in the arms and traps. There’s also a bonus benefit: The improvement of grip strength, which is pivotal for functionality outside of the gym. If you want strong forearms, this movement is for you.
How to Do It:
- Using a trap bar or two heavy dumbbells or kettlebells, simply pick up the load (ideally even on both sides). Be sure to use appropriate deadlifting form, maintaining a flat spine and driving with the legs.
- Once standing, walk with short, deliberate strides. Remember to use good posture, keeping the shoulders down and back, and letting the chest lead the way.
Sets and Reps: This is a burner, so try this challenge: Try to match your bodyweight equivalent (if you’re 200 pounds, hold 100 pounds in each hand) for anywhere from 6 to 10 rounds of 30 second walks, resting for 90 seconds between sets.
Pushup
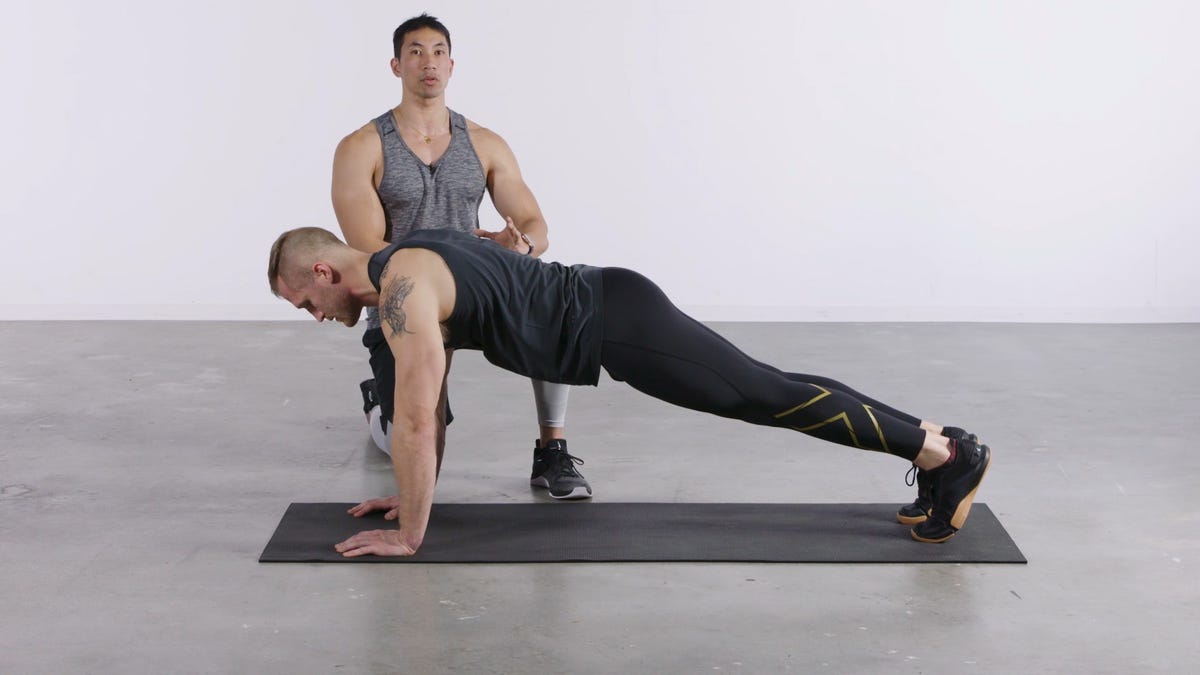
Why: The benefits of pushups are innumerable, and they are usually the upper body game-changer most men don’t realize (or admit) they needed in their routine. They’re the premier calisthenics exercise, and usually place a humbling dose of muscular endurance for the chest and triceps, while being a great core training tool. On top of this, they can promote healthy shoulders due to the free mobility at the scapula when compared to the bench press.
How to Do It:
- Start in a classic high plank position (on the hands and toes on the ground), and establish your starting posture. Your elbows should be locked out, and there should be a straight line from head to heel. Don’t let your hips sag in, or your back overarch.
- Keeping the hands at shoulder width, descend slowly toward the floor, letting the elbows tuck themselves in toward your sides.
- Once the torso has made gentle contact with the floor, press upward as one unit. Breathe out as you press (blow yourself away from the floor) until you reach complete lockout.
Sets and Reps: Pushups may seem rudimentary for some, so it’s worth making a challenge once you’re able to string together 15 consecutive reps or so with good form. A “ladder set” is performed in the following way: Perform 2 reps. Hold your top position after the last rep, and stay in that plank for 10 seconds. Then, perform 3 pushups. Hold the top position for 10 seconds, then perform 5 reps. Hold again for 10 seconds, and finally perform 10 reps, and rest completely. Aim for 4 to 5 ladder sets, with 2 minutes of rest between sets. You’ll need every second.
Dumbbell Bench Press
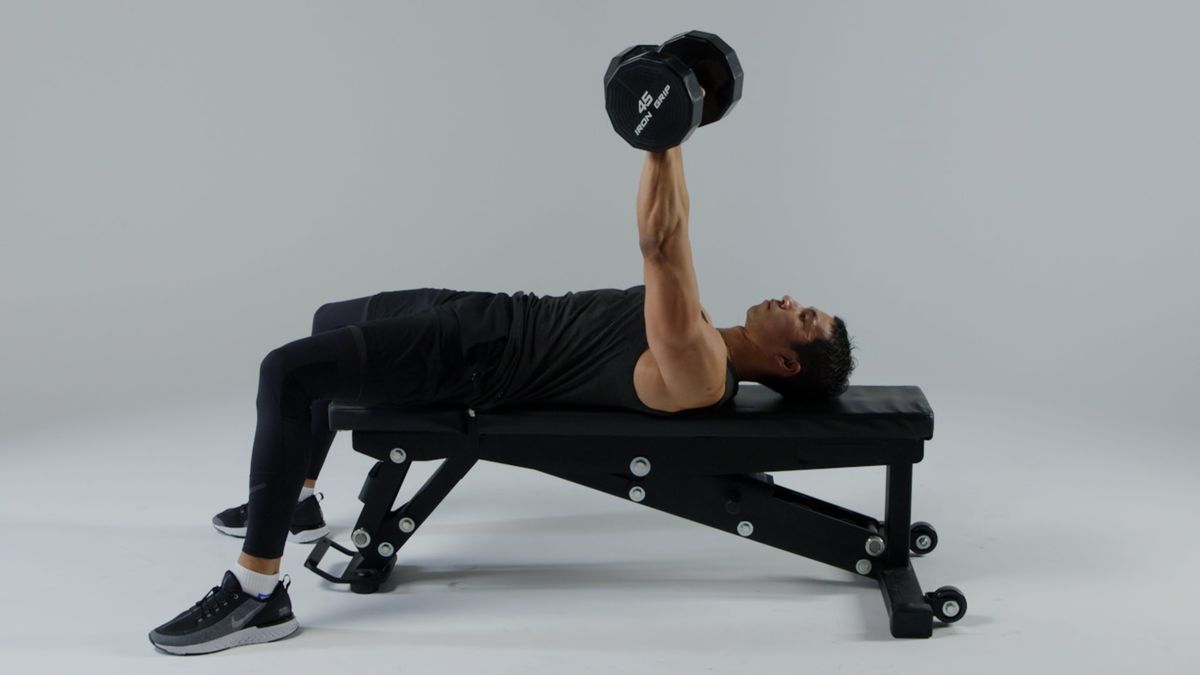
Why: This list wouldn’t be complete without a bench press variation, and using dumbbells will create much more hypertrophy gains than a barbell since you’ll be able to more easily isolate the muscles. Each pec is responsible to hold its own, while also stabilizing the weight. Dumbbells also allow for freedom to rotate the wrists as the reps progress, which can be an added comfort for a lifter compared to holding a fixed bar in one place through the entire range of motion.
How to Do It:
- Start with the dumbbells on the thighs as you sit on the edge of the bench. “Kick” the dumbbells up to your starting position as you fall back—this may be a skill that takes a couple reps of practice, but it’s worthwhile to master.
- Pull the shoulders back, and create some space between your low back and the bench. You’ll make this easier if you pull the feet in close so the knees are bent inside 90 degrees.
- Press the weight away from you to a full lockout above the chest. Don’t overreach; keep tight.
- Lower slowly to chest level and repeat.
Sets and Reps: This is a hypertrophy training tool, so focusing on 3 to 4 sets of 8 to 12 reps would be ideal for chest development.
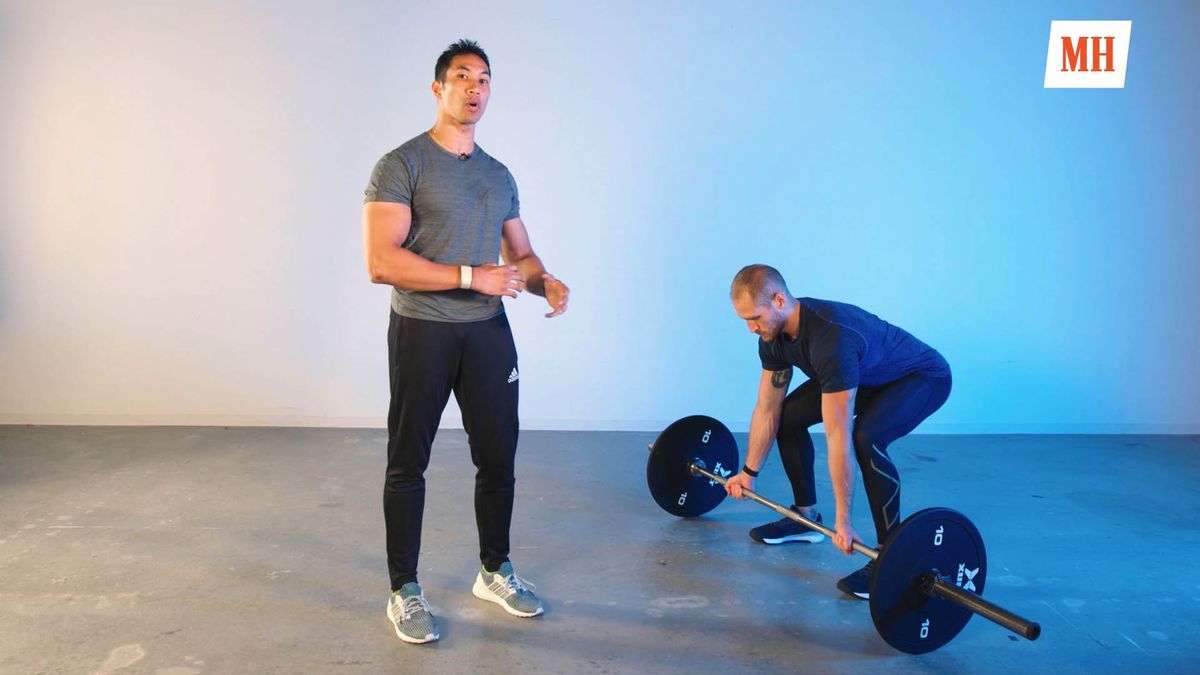
Barbell Bent-Over Row
Why: If there’s one total back mass builder worth adding to the portfolio, it’s the bent-over row. Done correctly, your spinal erectors are responsible for holding a heavy isometric contraction while your upper back works in a dynamic fashion, making this a movement that really torches the posterior chain and builds thickness throughout.
How to Do It:
- Start with a shoulder-width grip on a barbell while standing tall, and hinge your way downward until the bar hangs just below knee level, in very close proximity to the shin. Be sure to be mindful of your low back positioning, so you’re remaining neutral or mildly arched (like you would during a deadlift).
- Look at the ground 2 feet in front of the bar, and row the weight directly upward (it should contact the upper abs).
- Lower the bar to full arm extension and repeat. Remember to squeeze the shoulder blades together on each rep.
Sets and Reps: Perform 4 to 5 sets of 8 to 12 reps.
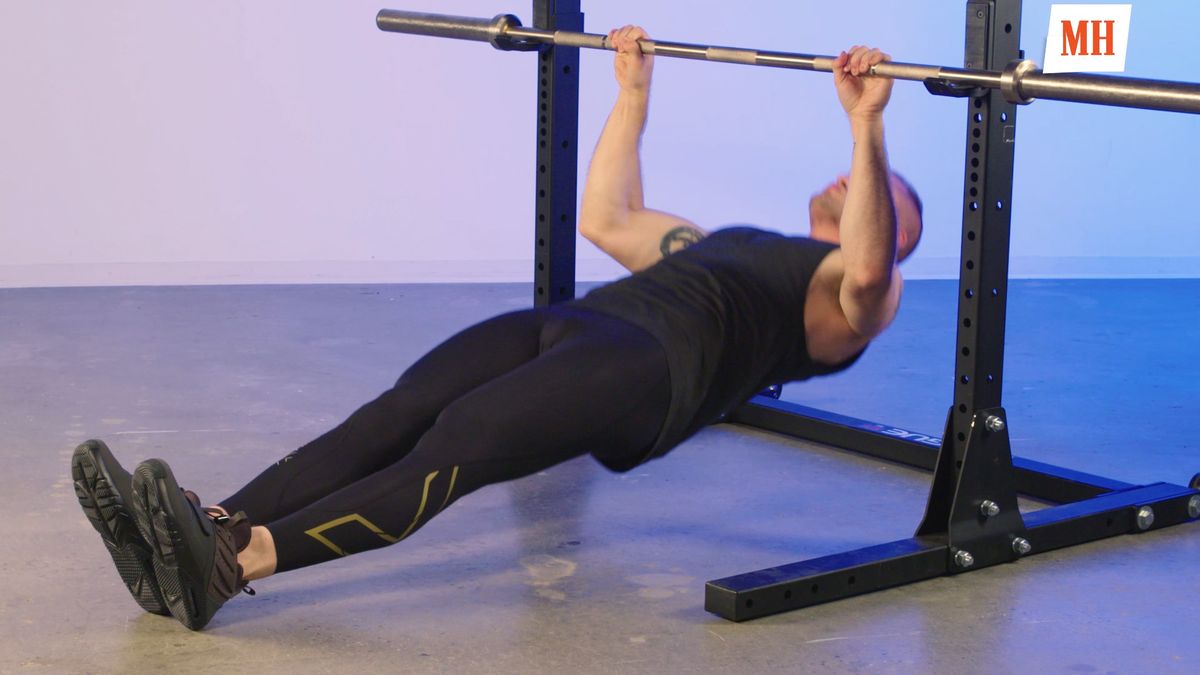
Inverted Row
Why: Especially in a poorly-equipped gym, this row variation can prove itself the most accessible and still service lifters of all skill levels. It’s another upper back developer that also minds lifters who may have lower back issues or prior injuries.
How to Do It:
- Set a bar at waist level, and make sure it’s secure (some like to load the bar with a plate or two on either side, so it’s harder to move around in the rack).
- Get under the bar, and plant the feet squarely on the ground and keep the knees bent at 90 degrees. Next, place the hands on the bar around shoulder width apart, using an overhand grip.
- Raise the hips off the ground so you’re “hanging”, and maintaining a straight body, squeeze the shoulders back as you pull yourself up to the bar level, looking for a strong contact on the lower chest from the bar.
- Lower slowly and repeat. If this setup is just too easy, switch to a straight-legged position, but make sure the point of contact on the chest doesn’t change.
Sets and Reps: This is a high-rep exercise for best results. Aim for 3 to 5 sets of 12 to 20 reps.
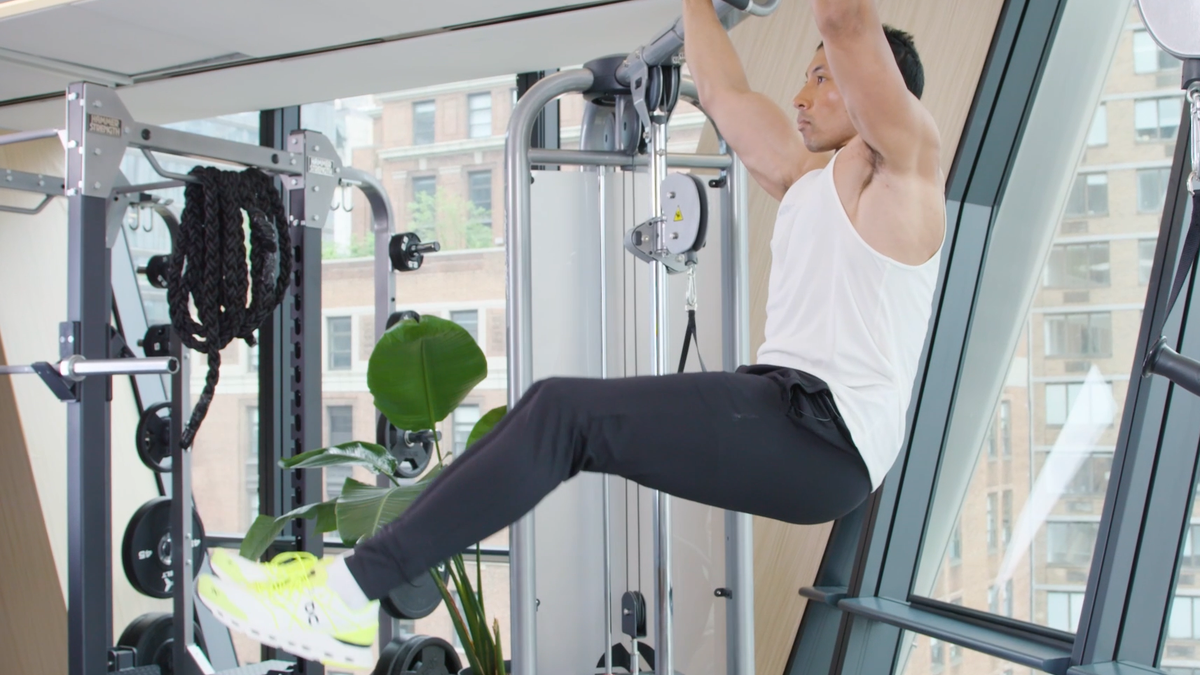
Hanging Leg Raise
Why: Let’s not forget the core as part of the upper body. And as far as core exercises go, the hanging leg raise is king. In addition to being a terrific way to target the abdominals, this doubles as an awesome grip strength developer. Talk about a win-win.
How to Do It:
- With a double overhand grip, hang from any pull up bar, and make sure your legs can straighten out below you.
- Without swinging, raise both legs upward, keeping the knees bent at about a 90 degree angle as you raise them. Aim for your thighs to cover your chest. It’s okay if your back rounds to achieve this.
- Lower the legs slowly to the starting position without swinging, and repeat. Remember: your speed will dictate how much control you perform the move with, and it will also dictate whether you’re using your abs the whole way through, or just jacking up your hip flexors. Slow and steady wins the race.
Sets and Reps: Aim for 3 to 4 sets of 8 to 10 good quality reps. Done well, this should be a burner.
Ab Wheel Rollout
Why: Speaking of core training, it’s important to note that the core serves more than one purpose. Whereas leg raises train trunk flexion (similar to a situp pattern) it’s useful to train the core through trunk extension. Ab wheel rollouts ask for a stiff trunk to stabilize the spine as the arms travel overhead. Adding this to leg raises gives lifters the best of both worlds to build a six pack that’s also chock-full of function—not just all show and no go.
How to Do It:
- For this, you’ll need an ab wheel. Kneel on a mat, and start with the wheel positioned very close to the knees on the ground. Make sure your back is as round as possible in this position, because as you extend your body, it’ll flatten itself out naturally.
- Slowly push the wheel away from the knees forward, and allow the hips to move forward with the wheel and hands.
- Reach as far overhead as your abs will allow you, without feeling any pressure in your lower back (if you feel pressure, you’ve reached too far).
- Brace hard, and pull the wheel back in to the starting position by reversing the action.
Sets and Reps: Focus on 3 to 4 sets of 6 to 10 reps, depending on your skill level.
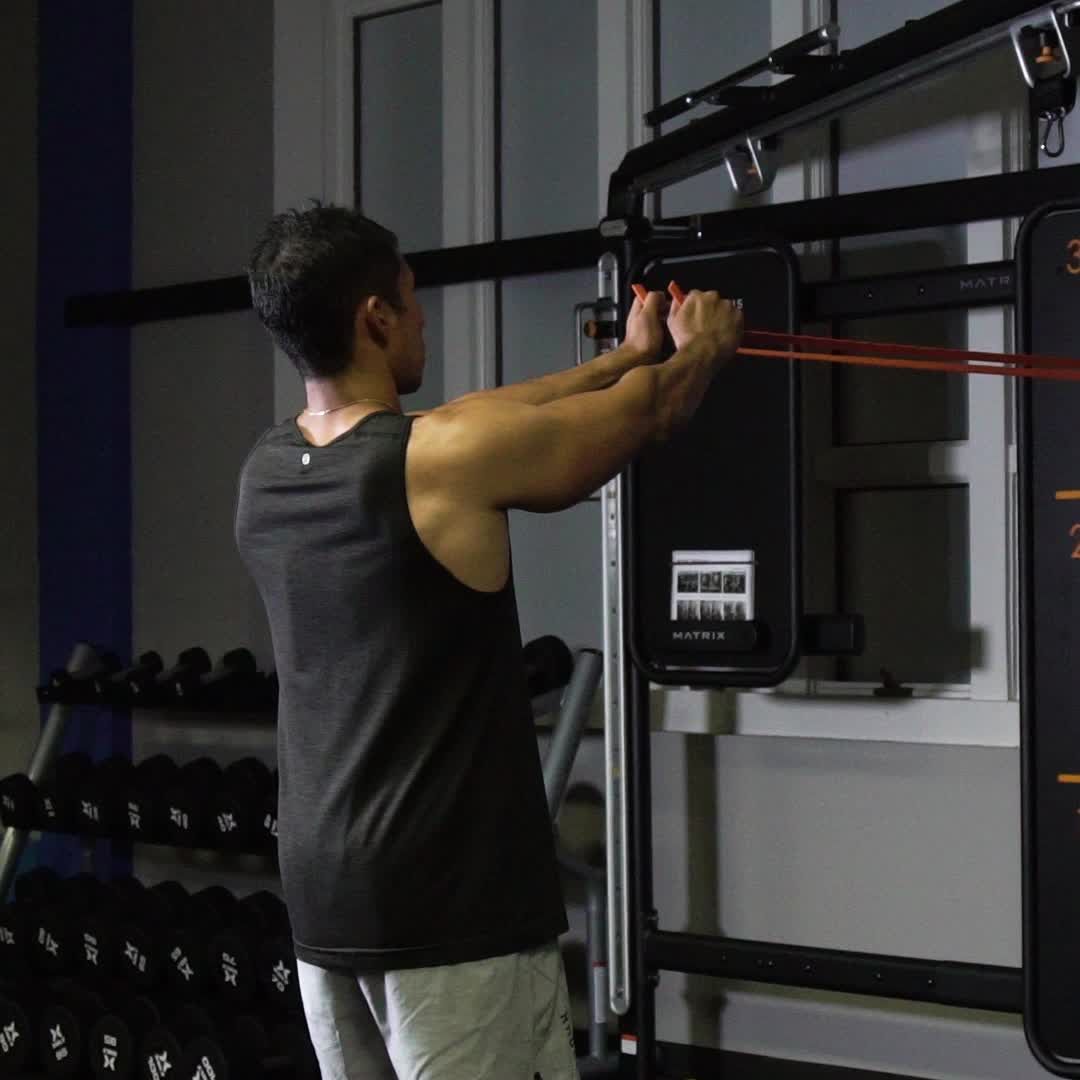
Face Pull
Why: This movement is one of the best upper body “medicine” movements you can do, and it can be performed with bands, cables, or even dumbbells. You can’t overtrain this movement, and it’s a game-changer for shoulder health, posture correction, and upper back development. Simply put, you don’t want this out of your plan.
How to Do It:
- Set the pulley or resistance bands up at forehead level, and hold the implement with a double-overhand grip. Keep the hands and elbows high, and step back with the ropes so the weights are off the stack.
- With high elbows in line with the ropes and cable, squeeze the shoulders back and pull the ropes right to nose level. Be sure to pull the hands apart, and feel for your rear deltoids and mid back muscles to contract.
- Pause at the point of full contraction on each rep.
- For this movement, you shouldn’t attempt to lift the entire stack. Lighter weight is actually more effective than going heavy here.
Sets and Reps: Start with 4 to 5 sets of 15 to 20 reps
Lee Boyce is a Toronto-based personal trainer, college professor, and fitness writer. He is the owner of Boyce Training Systems.

